
Halloween is on the way, but there’s still plenty of time to deck the house! This is a small picture tutorial to get you in the spirit. Don’t worry, it looks much more intimidating than it is 🙂

*This is based on a granny square pattern I found on YARNutopia (click here for their more beginner-friendly tutorial)
Skill Level: Easy
Duration: ~1 hour
Knowledge Required (US terms):
- Crochet in the Round
- Chain Stitch
- Slip Stitch
- Single Crochet
- Colour swapping (optional)
The tools you will need for this project are as follows (US terms):
- Less than 50 yards of yarn (I used medium weight acrylic, Red Heart Soft in White, Orange and Yellow. I also used medium weight cotton, Sugar n’ Cream in Black)
- 5 mm hook (or the appropriate size for your yarn)
- Scissors
- Darning Needle
The pattern will use the following abbreviations:
- Ch(s) (Chain Stitch(es))
- St(s) (Stitch(es))
- SC (Single Crochet Stitch)
- SCBL (Single Crochet in Back Loop only)
- Sk (Skip a stitch)
Tip: You can scroll over any pictures to see a short descriptive caption for each action
Let’s get started!
Round 1: (Using Black) Ch 4, Sl into 4th Ch from the hook

Round 2: Ch 1, SC 16, Sl closed into first SC of round

Round 3: Attach White, *SC 1, Ch 11, Sk 1*, Repeat * pattern all the way around, Sl closed


* You will have 8 chain loops at the end. These will become our candy corns
Round 4: SC 1, *SCBL up the first 5 Chs, SC 3 into next st, SCBL down the last 5 Chs, SC into bottom SC between Chs (this is a regular SC through both loops)*, Repeat * pattern all the way around, Sl closed
*We put 3 SC in each 6th Ch to create the tip of our candy corns. This will therefore increase the number of sts for each round.


*For the next two colours (Orange and Yellow), we will repeat the pattern we used for the White, but because we keep increasing sts for our tip (3 SC in each), each round will consist of an extra 2 sts in each Ch
Round 5: Attach Orange, SC 1, *SCBL up the first 6 Chs, SC 3 into next st, SCBL down the last 6 Chs, SC into bottom SC between Chs*, Repeat * pattern all the way around, Sl closed


Round 6: Continuing with our increase pattern, SC 1, *SCBL up the first 7 Chs, SC 3 into next st, SCBL down the last 7 Chs, SC into bottom SC between Chs*, Repeat * pattern all the way around, Sl closed
* You’ll notice the further along you get, the more the project starts to twist itself – that’s fine! This will make it easier to twist later

Round 7: Attach Yellow and continue with increase pattern, SC 1, *SCBL up the first 8 Chs, SC 3 into next st, SCBL down the last 8 Chs, SC into bottom SC between Chs*, Repeat * pattern all the way around, Sl closed


Each Ch is now a candy corn. Before we start Round 8, we need to make sure our project is properly twisted. Take each candy corn and fold the right side over the left. You can use your hands to press them down into place. They will mostly hold but if they pop up, that’s ok for now. Round 8 will keep them in place.

Round 8: From the tip St of any candy corn (this will be the second st of any group of 3 in our tips)
*Count 4 sts to the right and attach Black, SC 4 up the side of the candy corn (including the st you attached to), SC 3 into next st (the tip), SC 4 back down the candy corn*
Hop to the next candy corn and Repeat * pattern for each candy corn all the way around, Sl closed


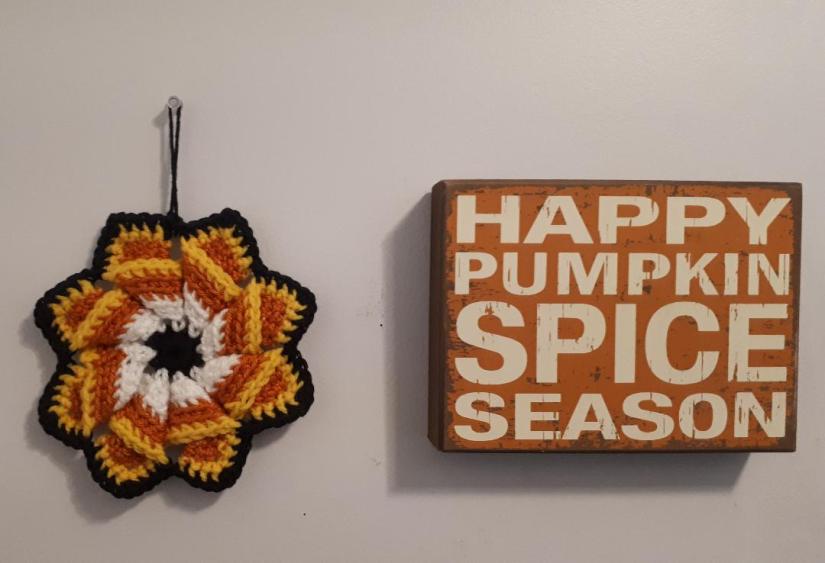
Voila!
I used my tail to create a loop so I can hang up my Candy Corn pinwheel.
*Tip: Doing this in solid red would probably make a great Poinsettia for Christmastime – especially for a Christmas Tree!
Thanks for checking out this picture tutorial. As always, feel free to leave any questions in the comments.

That’s so cute!
LikeLike
Thanks 🙂
LikeLike