
DIY Decor and Spooky Eats
Hi all! I’m so excited that Halloween is finally on its way. I’ve been knee-deep in decorations for days now…


Can you guess the movie?
My cat is not being super helpful, but he is being super cute…

Fully in the spirit (the ghost of Halloween past, that is), I perused some of my pics from last Halloween for ideas to revisit or reinvigorate. I thought I’d share a few. I hope something you see here spooks your imagination… (oh, no… wordplay. I can’t seem to help it this time of year).
Simple DIY Decor
There are so many small DIY projects that can really make a difference. Here’s a couple I tried out last year.
Mason Jars
Practical kitchen items can be spooked up to bring a touch of Halloween to your kitchen or dining areas.

For the two jars on the end, I simply added some hot water and placed one blooming tea in each. These lovely teas blossomed, opening up in this eerie, tentacle-like way and browned the water.
In the middle jar, I placed a battery operated candle then wrapped some burlap around it, held in place by a strand of brown yarn.
Tips: You may want to let the tea cool before sealing to avoid seeing all that condensation.
Spray Painted Pumkins
Carving isn’t the only way to Halloween-up a pumpkin.
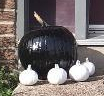
I always find carving pumpkins more appealing in theory. I’m not very good at it and I have a pain issue that makes it pretty tough. So, last year, I threw out the tradition and tried spray painting them instead for a haunting yet elegant vibe. I was really happy with the results. As a bonus, the paint kept the critters away.
Spooky Eats
Last year was the first time I attempted themed treats. I’m really excited to experiment even more in this department. I plan to share some recipes throughout the month, so keep your eyes out for that.

Witch Fingers & Ghosts
For the fingers, I made shortbread cookie dough and rolled it into finger shapes, detailing as you would with play-doh. Red food gel was used for the nails.
For the ghosts, I made simple shortbread and used a ghost-shaped cookie-cutter, and detailed with white frosting. I finished up with two drops of red gel for the eyes.

Bloody Chocolate Cups
These were really simple. Three ingredients, no baking. I melted and mashed frozen raspberries in a pot and mixed in molasses to darken the colour and give it that viscous texture.. yum! Separately, I melted dark chocolate. Then, in muffin cups, I poured a bit of chocolate, a bit of raspberry filling, and more chocolate. I popped them in the fridge for about an hour, then removed them from the cups. Since this part is messy, it’s normal for the cups to nearly fall apart, but that’s okay, because it gives it a great ‘dripping with blood’ effect.

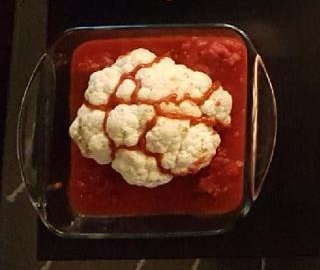
Cauliflower Brains
Cauliflower… so versatile! Ever notice how much it resembles a brain? I sure did, and I went with it. I plopped the head in to a dish of salsa and squeezed sriracha sauce into some of the natural crevices. Serve with chips!
Cheese Puff Eyeballs
I found this recipe online. They looked great, but I actually didn’t love the way they tasted, so I’m hoping to improve on the recipe this year. I’ll keep you posted!

***
Stay tuned for more DIY decor and recipes throughout the month 🙂
Happy Spooktober. Stay Strange.

Spooky and tasty, it’s a win, win!
LikeLiked by 1 person
I love your Hallowe’en decoratins! Truly inspirational!
LikeLiked by 1 person
I’m all about that Halloween spirit 🎃
LikeLike